

Ever thought about building a guinea pig palace that doesn’t break the bank? With a DIY guinea pig cage, you can create a safe, custom home that gets your pets moving and playing. Imagine a little setup featuring a cozy loft and a smart ramp, all built from affordable materials and simple tools. Our guide walks you through every step, from sketching your layout on paper to locking in the final pieces. Try it out and see how each careful cut and measurement builds a happy home your guinea pigs will truly love.
Ultimate Step-by-Step DIY Guinea Pig Cages Construction Guide

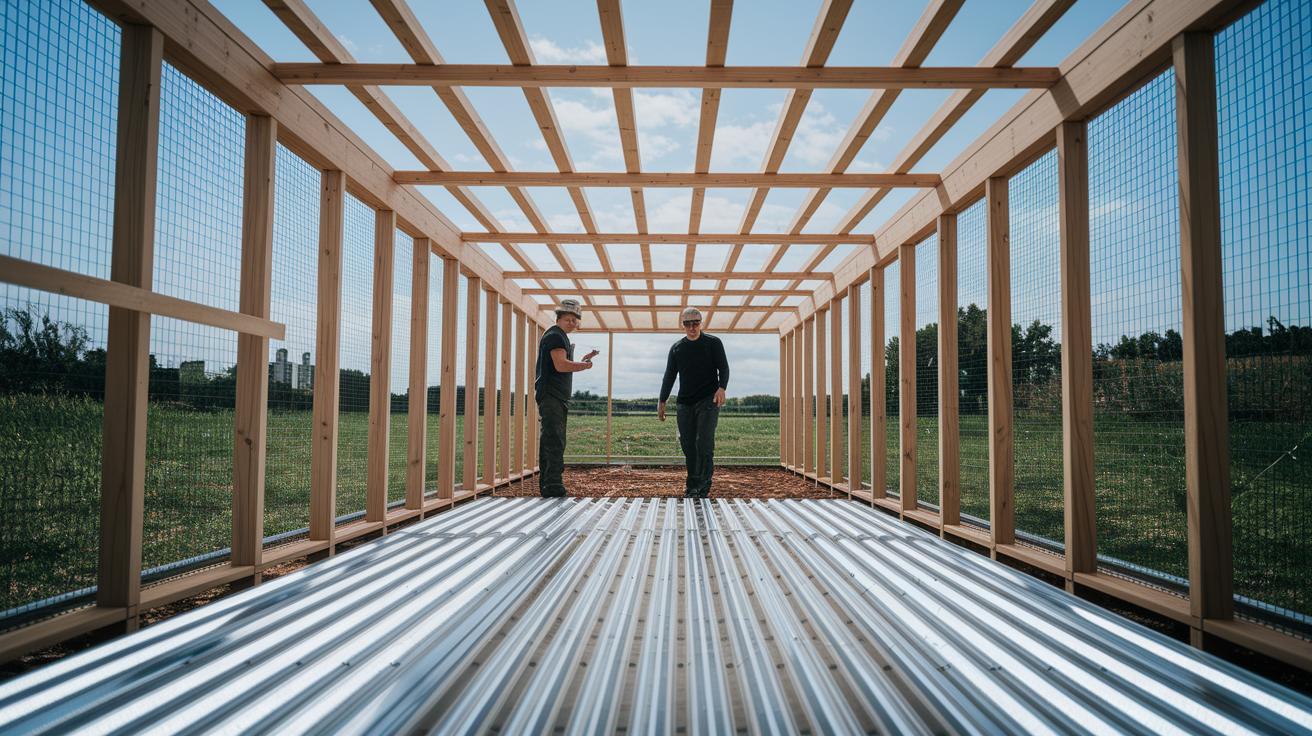
Start by drawing your cage design on paper. This helps you see a 5×2 layout with a loft and lid. For example, you might write, "I want a ramp near the loft to help with exercise." This note guides the size and build.
Next, mark your coroplast base using your measurements and cut it with a utility knife. A clean cut is key, much like slicing a neat piece of cake. Precise cuts make sure every wall fits together well.
Now, score the thin plywood to create flexible panels. Use a table saw carefully to avoid cutting too much. Once scored, gently bend the panels to form walls that join perfectly with the base. Secure them with tape and cable ties for extra stability.
Follow these construction steps:
- Sketch the layout and plan dimensions
- Mark and cut the coroplast base
- Score plywood for flexible walls
- Assemble the walls and secure with tape and cable ties
- Add extras like ramps, lids, or stands if you want
After the frame takes shape, install the grid panels and any extra features like a loft or pull-out drawers. For safety, seal all gaps with food-grade silicone caulk to stop urine spray and prevent chewing hazards.
Remember, each step builds a safe home for your guinea pigs. Measure twice and cut once to avoid mistakes. Regular cleaning and proper bedding will keep your custom cage a happy and healthy home.
Essential Materials and Tools for Your DIY Guinea Pig Cages

Start with a list of safe and budget-friendly materials. You'll need scrap wood to build the frame, corrugated plastic (coroplast, which is water-resistant) for the base, and thin plywood for cage sides that are both flexible and strong. Repurposing old cabinets can add extra storage or style when you mix them with clear plexiglass panels. These panels sit in channels cut ½ inch deep in the vertical supports. This setup keeps your guinea pigs secure by stopping escapes and containing any urine spray. You might also want to try kits like the Kavee C&C supply grids, plus extra coroplast sheets, cable ties, and connectors to make assembly easier.
Next, gather the essential tools. A table saw helps you cut plywood accurately. Use a measuring tape to be sure your sizes are right, remember, measure twice and cut once. A sharp utility knife is perfect for scoring and cutting coroplast. Cable ties are useful for holding parts together securely. And keep some food-grade silicone caulk handy to seal any small gaps, which keeps your pets safe from loose bits.
| Materials | Tools |
|---|---|
| Scrap wood, corrugated plastic (coroplast), thin plywood, plexiglass panels | Table saw, measuring tape, utility knife, cable ties, food-grade silicone caulk |
These carefully chosen materials and tools form a solid foundation for a safe, eco-friendly, and cost-effective guinea pig cage.
Indoor DIY Guinea Pig Cage Plans and Blueprints

Before you start, draw a scaled diagram. Sketch the 5 x 2 layout and label all the dimensions. Use a felt-tip marker to mark exact spots on the 24 x 24 in (61 x 61 cm) coroplast base. This extra step helps prevent mistakes later.
Cut the coroplast with a utility knife and use a straightedge for a clean line. When you work with plywood, adjust your table saw to a shallow depth so the board can bend without breaking. If you see any cracking, score along the bendline in several light passes, think of it like slicing through a soft sponge.
Secure the grid panels with cable ties. Check each tie to make sure it stays tight. If one loosens, add another twist tie or use a construction clamp. A useful tweak is to add a ramp. Use a plywood strip with a non-slip mat and set it at a 30° angle, just like a short stair step, to give your guinea pigs a way to move between levels.
It can help to create a detailed blueprint with extra measurements and possible layout options. This lets you adjust panel widths for different indoor spaces or create a hidden play area by adding sideways panels.
You can easily change the cage setup with modular connectors. Just be sure to smooth all cut edges so your pets don’t get scratched or caught.
| Component | Measurement |
|---|---|
| Base | 24 x 24 in (61 x 61 cm) |
| Layout | 5 x 2 grid |
| Ramp | Approx. 12 in (30 cm) long, 30° incline |
Troubleshooting tip: If cable ties loosen or panels shift, recheck your measurements and add extra ties for more security.
Outdoor DIY Guinea Pig Cage Ideas and Designs
Build your outdoor cage using strong wood frames or even old cabinets for a unique look and lasting strength. We recommend increasing the depth from 24 in (61 cm) to 27 in (69 cm) for extra stability and protection from the weather. A plywood top with a 1–2 in (2.5–5 cm) overhang and a rear bumper helps keep the whole setup in place when it gets windy. Corrugated plastic floors work well too; they push moisture away and offer a smooth, easy-to-clean surface.
Safety is key. Use plexiglass panels that stand 16 in (41 cm) tall, setting them into 1/2 in (1.3 cm) deep channels in the supports. These panels stop escapes while letting you watch your pets closely. To be extra safe, seal all gaps with food-grade silicone caulk to prevent waste buildup and stop little critters from getting in.
| Design Type | Pros | Cons |
|---|---|---|
| Wood-Framed Cage | Durable, weather-resistant | Heavier, more time-consuming |
| C&C Grid Cage | Modular, easy assembly | May need extra finishing |
| Cabinet-Based Cage | Space-saving, repurposes old materials | Potential gaps, less ventilation |
If you prefer a ready-made option, check out the best guinea pig cage at this link: best guinea pig cage.
Maintenance and Safety Advice for DIY Guinea Pig Cages

Keep your guinea pig area clean and safe by doing a quick clean-up every day. Use washable fleece or absorbent bedding to catch spills and waste. For example, you might say, "I wipe the bedding each morning with a damp cloth" to keep the space tidy and comfy.
Once a week, give the cage a full cleaning. Remove and swap out the coroplast liners and wipe down all the walls. This helps stop ammonia (a gas from waste that can harm breathing) from building up. Use food-grade silicone caulk (a safe sealant for pets) to seal seams and small gaps so messes and pests stay out.
Make sure your cage has at least 7.5 square feet per guinea pig. If you have more than one, check out a larger cage designed for 2 guinea pigs so each pet has room to roam and you get less concentrated waste.
Avoid carpeted floors because they hold dirt. Instead, choose smooth coroplast or sealed plywood, which are easier to clean.
Change the bedding every 2 to 3 days to keep the habitat healthy. Regular cleaning and checking the ventilation will create a safe, fresh home that both you and your guinea pigs will appreciate.
Custom Modifications for Enhanced DIY Guinea Pig Cages

Quick verdict: Simple tweaks can turn an ordinary cage into an engaging home for your guinea pigs. These upgrades boost exercise and storage while keeping things tidy.
Start by adding ramps or lofts. A small ramp can serve as a slide for your pets, making playtime fun and gentle exercise a natural part of their day.
Next, make room for storage. Use pull-out drawers or the space under the cage for food and bedding. This acts like a hidden pantry, keeping supplies neat and your clean-up routine hassle-free.
Consider adjusting the walls by using 16-inch plexiglass or mesh panels. This change improves airflow and lets you see your pets easily. One DIY fan noted that transparent panels brightened the area and made checking on his pets a quick job.
Widen the cage to 27 inches deep and add an extra inch or two at the front. This extra space creates room for tunnels or hideaways, letting your guinea pigs explore new corners. Use cable-tie connectors so you can take the design apart or rearrange it easily later.
Other ideas include mounting hooks for hay bags and water bottles, or adding small tunnels and hideaways for extra comfort. These smart modifications transform a simple cage into a lively space that keeps your pets happy and active.
Final Words
In the action, this guide walked you through every step, from sketching your design and assembling materials to fine-tuning safety and ease of cleaning. We covered indoor plans with clear blueprints, outdoor designs built to last, and smart custom tweaks to boost your pet’s fun. The detailed process shows how to build safe, cost-effective diy guinea pig cages that work for any space. Keep experimenting and adjusting; your pet’s comfort and enjoyment are well worth the effort.
FAQ
Q: Diy guinea pig cages indoor
A: The diy guinea pig cages indoor approach creates a compact, safe habitat using simple, affordable materials. These designs cater to space efficiency while allowing proper ventilation, easy cleaning, and customizable features like ramps and lofts.
Q: DIY Guinea Pig cage Ikea
A: The DIY Guinea Pig cage Ikea idea adapts Furniture-inspired designs for small pet homes. It combines budget-friendly repurposed items with simple construction techniques to offer secure, stylish, and easy-to-clean habitats.
Q: DIY guinea Pig cage with lid
A: The DIY guinea pig cage with lid concept focuses on added security and maintenance ease. A lid helps prevent escapes, regulates temperature, and simplifies cleaning by keeping bedding and waste contained.
Q: DIY guinea pig hutch outdoor
A: The DIY guinea pig hutch outdoor design emphasizes durability and weather resistance. It uses sturdy materials like wood and coroplast to build a secure, well-ventilated space that withstands the elements while keeping your pet safe.
Q: How to build a guinea pig cage out of wood
A: The process to build a guinea pig cage out of wood involves sketching a safe layout, cutting and assembling wood panels, and ensuring proper ventilation. Each step ensures a durable, well-ventilated home that is also easy to maintain.
Q: DIY guinea pig house cardboard
A: The DIY guinea pig house cardboard project offers an economical, temporary shelter. It uses sturdy cardboard constructions for short-term housing, though it needs regular replacement and careful monitoring to ensure your pet’s safety.
Q: DIY guinea pig toys
A: The DIY guinea pig toys idea inspires creating fun, safe playthings from everyday items. These toys engage your pet with chew-resistant textures and interactive features that keep them entertained without risking their health.
Q: C&C guinea pig cage DIY
A: The C&C guinea pig cage DIY method uses modular coroplast and grid panels for creating a secure, easy-to-assemble enclosure. This design allows quick disassembly for cleaning while adapting to various space needs.
Q: Can you make your own guinea pig cage?
A: The concept behind making your own guinea pig cage emphasizes design flexibility and cost-effectiveness. Building a custom enclosure lets you cater to your pet’s specific space, hygiene, and safety requirements using readily available materials.
Q: Is a 2×4 cage big enough for 2 guinea pigs?
A: The question regarding a 2×4 cage size for two guinea pigs raises space issues. Two guinea pigs need at least 7.5 square feet each to thrive, offering enough room for exercise, proper ventilation, and hygiene.
Q: Why is it illegal to own one guinea pig?
A: The issue of owning a single guinea pig is rooted in social behavior needs. Laws recommend pairing guinea pigs because they are social animals, and keeping one may be seen as neglecting their essential companionship.
Q: What is the leading cause of death in guinea pigs?
A: The leading cause of death in guinea pigs is often related to respiratory infections maintained by poor hygiene and ventilation. Regular cleaning and ensuring a properly ventilated living space are critical to preventing these health issues.
